The Lost Tutorial of Kafka 🎏 Pt. 2
🔨 Setting up Maven
My name is Luis Miranda and I am a full-stack Software Developer with recent experience building Microservices oriented applications. I attended Florida International University where I pursued a Bachelor's degree in Computer Science. Now I'm at PilotoMail building cool things
The first thing will do is set everything up in our work environment by building an initial skeleton. Here will be creating a Maven parent project with submodules. I'll mostly do all the setup using IntelliJ, I recommend you do the same as well, it's the easiest way to get started and have everything set up. Lastly, I want to mention that I plan to complete an MVP first. After all the basic requirements are down, we can move further and create more features.
Parent POM
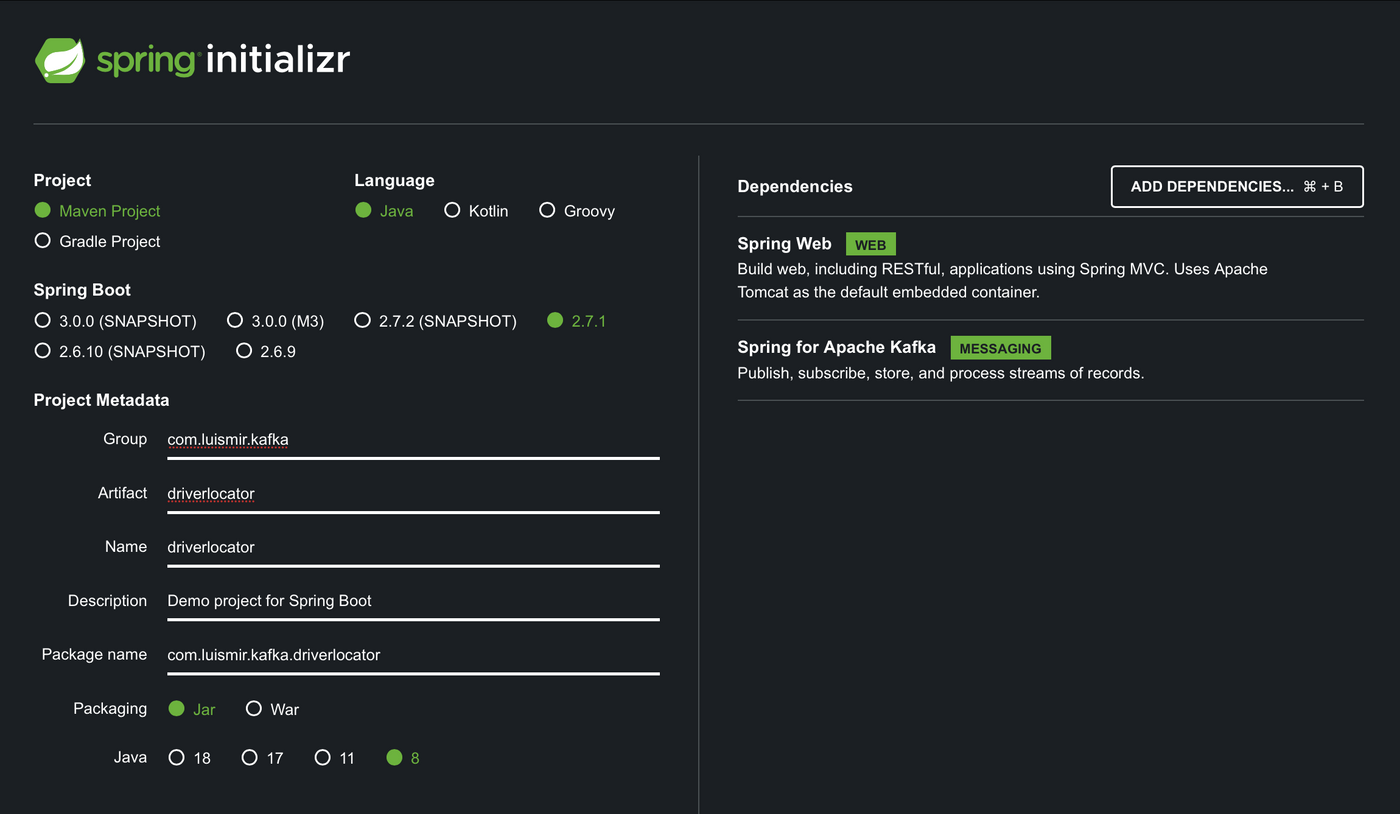
Let's start by creating the parent project. You can use the Spring Initializer website or IntelliJ if you have the Ultimate edition (I'll be using this for development). Make sure you select these options:
Project: Maven
Language: Java (this part doesn't matter)
Spring Boot: Whichever LTS version you have available
Project Metadata: feel free to fill it out however you want
Packaging: Jar
Java: 8 or higher
Dependencies:
Lombok
Spring Web
Spring Data JPA
MySQL Driver
Spring for Apache Kafka
Now, because this is a parent project, we only need the pom file. So, just delete everything else and this line to the pom.xml: <packaging>pom</packaging>. Before we go ahead and create the other modules run the following command to make sure everything is good: mvn clean install
[INFO] ------------------------------------------------------------------------
[INFO] Reactor Summary for driverlocator 0.0.1-SNAPSHOT:
[INFO]
[INFO] driverlocator ...................................... SUCCESS [  1.683 s]
[INFO] ------------------------------------------------------------------------
[INFO] BUILD SUCCESS
[INFO] ------------------------------------------------------------------------
[INFO] Total time:  12.519 s
[INFO] Finished at: 2023-07-08T14:14:29-04:00
[INFO] ------------------------------------------------------------------------
Submodules
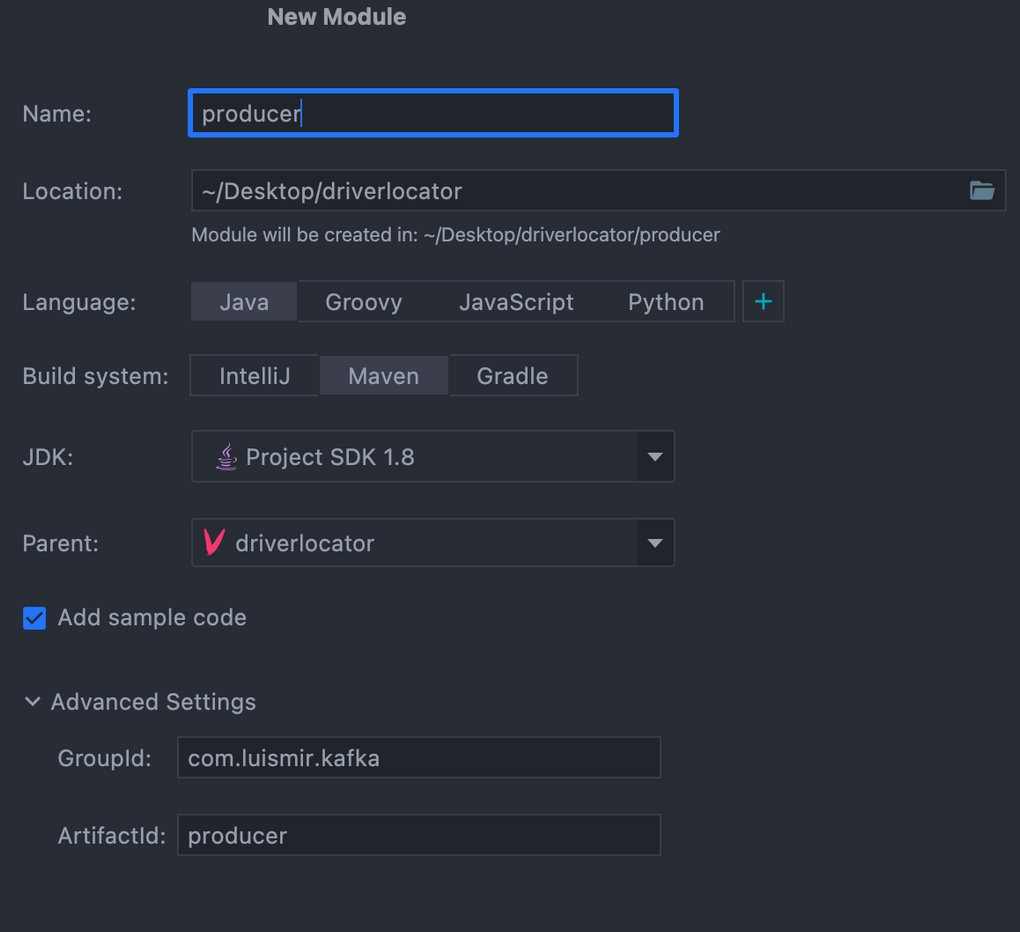
When creating the submodules, I'll mainly be using IntelliJ, but I'll also point out some commands if you want to do it through the maven cli. To create a new module: right-click the project folder and hit New > Module, and the following window will appear. Add the module name and hit create. To create it through the maven cli run this command: mvn archetype:generate -DgroupId=com.luismir.kafka -DartifactId=producer. Generating the submodules will be different depending on the method you chose, but when you run mvn clean install it should build successfully. After creating the submodules, your parent pom should be updated and have this section:
After creating the submodules, your parent pom should be updated and have this section:
<modules>
    <module>producer</module>
    <module>consumer</module>
    <module>service</module>
</modules>
Kotlin Support
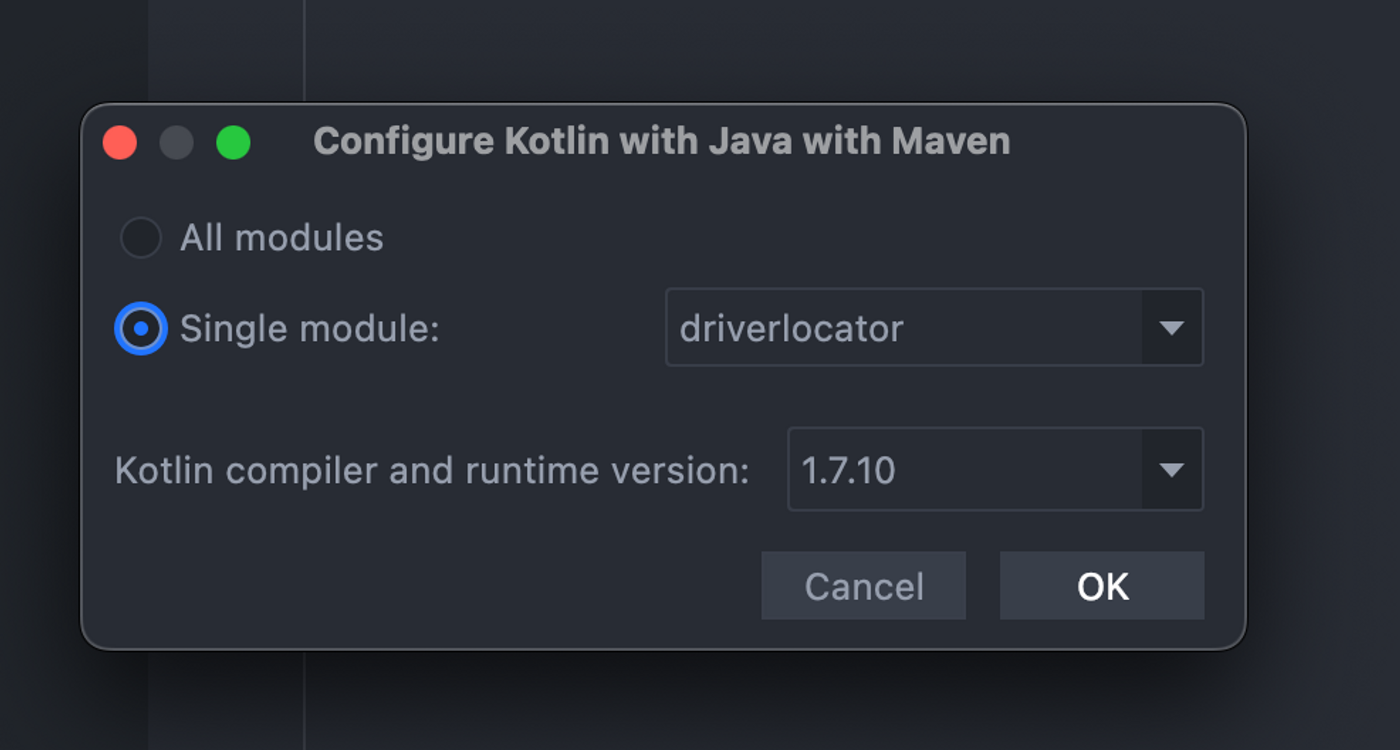
To use Kotlin, IntelliJ will help us set it up (I'll share the changes to add it in the parent pom). In the Tools tab, go to Kotlin > Configure Kotlin in Project. Then I window will appear to specify which module to add, and choose the parent pom.
By doing that, the parent pom should be updated as so:
<?xml version="1.0" encoding="UTF-8"?>
<project xmlns="http://maven.apache.org/POM/4.0.0" xmlns:xsi="http://www.w3.org/2001/XMLSchema-instance"
    xsi:schemaLocation="http://maven.apache.org/POM/4.0.0 https://maven.apache.org/xsd/maven-4.0.0.xsd">
    ...
    <properties>
        <java.version>1.8</java.version>
        <kotlin.version>1.7.10</kotlin.version>
    </properties>
    <dependencies>
        ...
        <dependency>
            <groupId>org.jetbrains.kotlin</groupId>
            <artifactId>kotlin-stdlib-jdk8</artifactId>
            <version>${kotlin.version}</version>
        </dependency>
        <dependency>
            <groupId>org.jetbrains.kotlin</groupId>
            <artifactId>kotlin-test</artifactId>
            <version>${kotlin.version}</version>
            <scope>test</scope>
        </dependency>
    </dependencies>

    <build>
        <plugins>
            ...
            <plugin>
                <groupId>org.jetbrains.kotlin</groupId>
                <artifactId>kotlin-maven-plugin</artifactId>
                <version>${kotlin.version}</version>
                <executions>
                    <execution>
                        <id>compile</id>
                        <phase>compile</phase>
                        <goals>
                            <goal>compile</goal>
                        </goals>
                    </execution>
                    <execution>
                        <id>test-compile</id>
                        <phase>test-compile</phase>
                        <goals>
                            <goal>test-compile</goal>
                        </goals>
                    </execution>
                </executions>
                <configuration>
                    <jvmTarget>1.8</jvmTarget>
                </configuration>
            </plugin>
        </plugins>
    </build>

</project>
For the remaining modules, follow the same steps as above for the producer.
Docker
One last thing, add the docker-compose file to the root directory. If you're using IntelliJ, you can run that file from there. If you wish to start it from the command line, run docker compose up.
Conclusion
We created three main modules, which can be broken apart into more modules further down if necessary. We have the driver producer and consumer which will mainly be in Kotlin. The producer will be sending events to the cluster for the consumer to listen to those events. Then we have the store service, which will consist of a regular REST API with its respective layers.
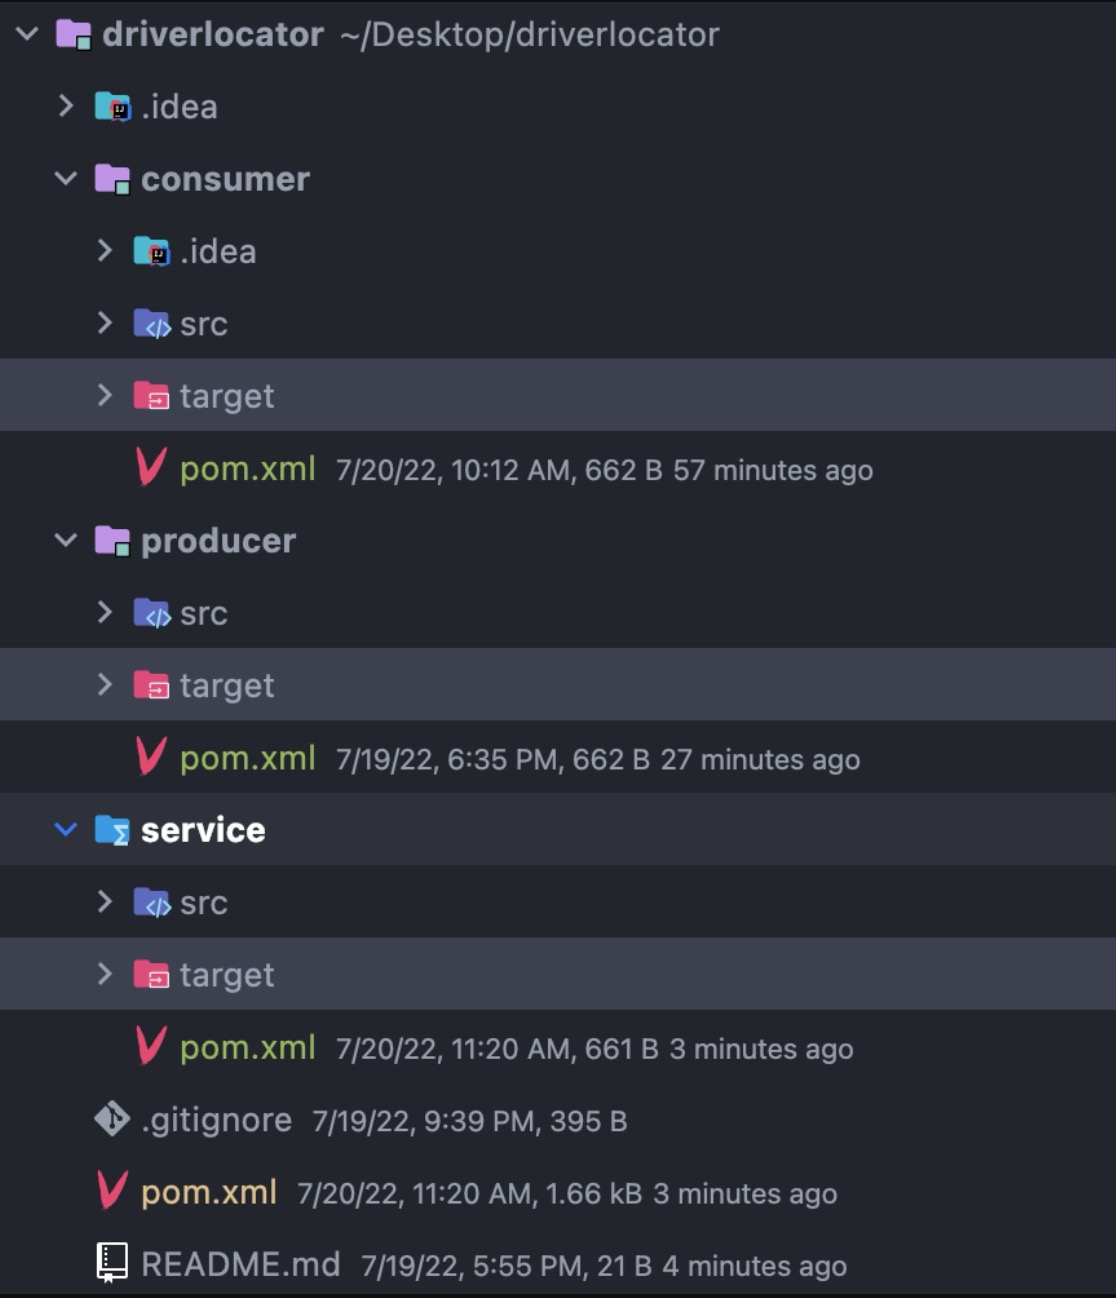
The code structure should look as in the image below. Now we are ready to work with the producer.